🎛️ Studio
xMagic Studio is the control room for everything your AI does—from high-level Agent settings down to Job-specific tools and Shortcuts.
Studio Layout
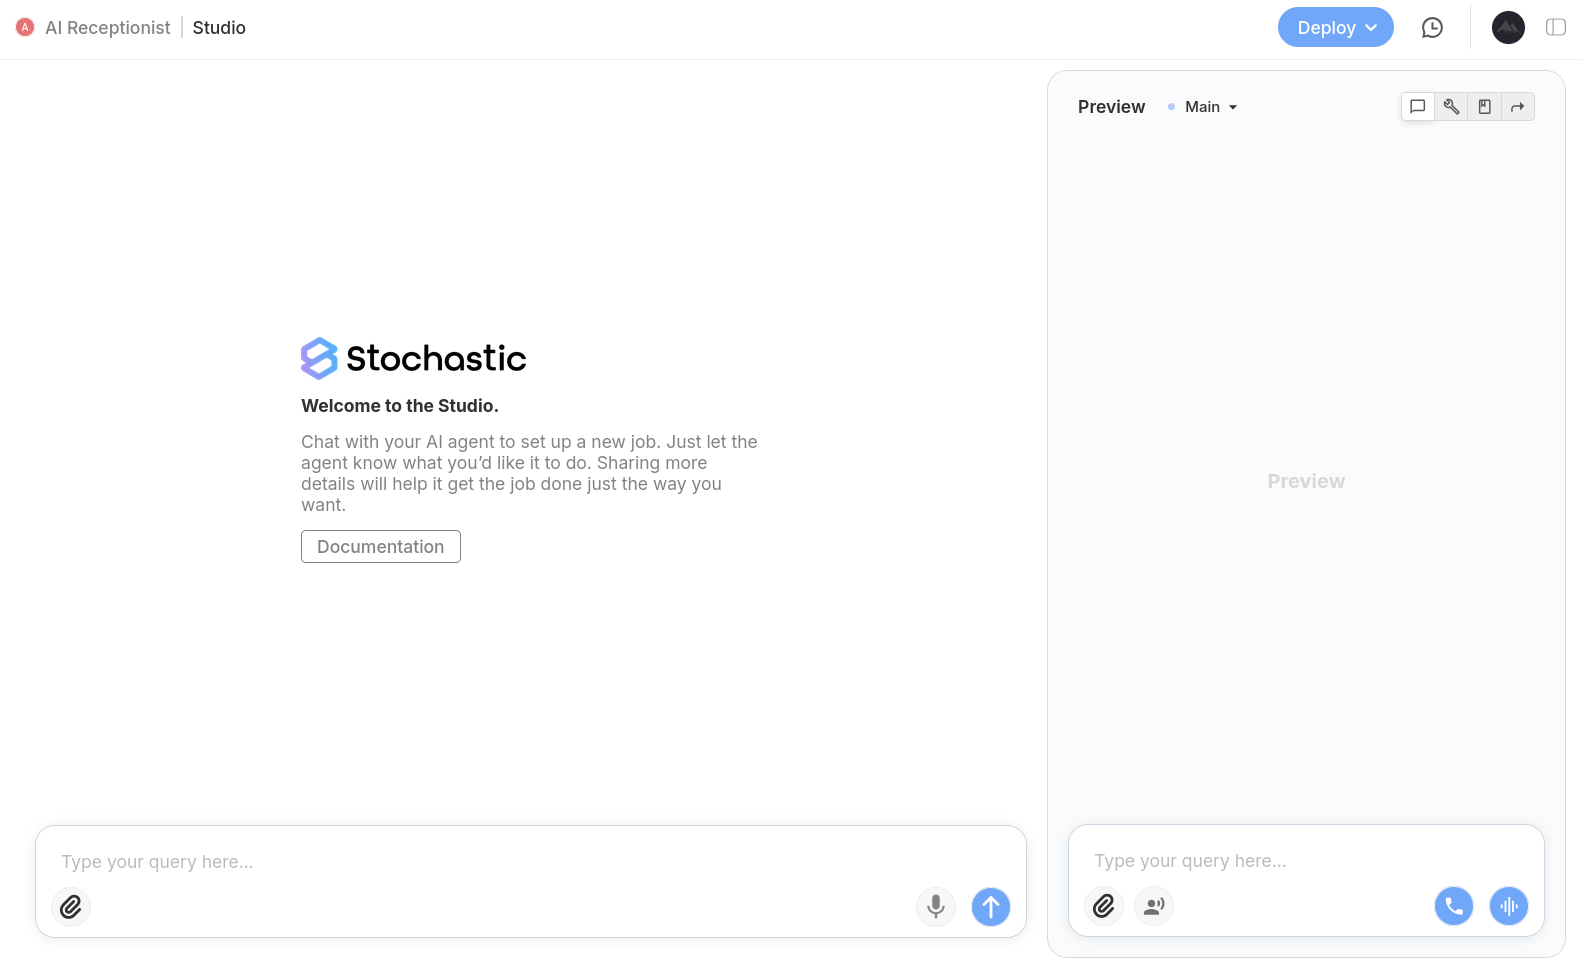
Studio is a two-panel interface:
| Panel | Description |
|---|---|
| Configuration (left) | Natural language based chat interface for creating or editing Jobs, attaching Tools / Workflows, and more. Just start simply by describing what you want to do. |
| Preview & Settings (right) | Preview - to try & test changes real time Configuration - to manually review all settings in one place Knowledge - to view connected data folders Shortcuts - to manage shortcut commands. |
Agent-level configuration
| Setting | What it controls |
|---|---|
| Assistant name & icon | Branding in chat UI. |
| Agent language | Default language for replies. |
| Voice type | Male / Female for TTS channels. |
| Model | Select GPT-4o, GPT-3.5, etc. |
| Agent prompt | System message (default: instructs simple Q&A + hand-off to Jobs). |
| Suggested questions | Clickable chips shown on first load. |
| Welcome message | First greeting your users see. |
| Enable incoming calls | Turns on voice hotline for the Agent. |
| Phone number | Choose a purchased number for voice/SMS. |
| Shortcuts | Shortcut commands linked to a job. |
Shortcuts (quick actions)
Shortcuts are clickable buttons that users can tap to trigger specific Jobs or workflows. They’re great for guiding users toward common actions or important flows.
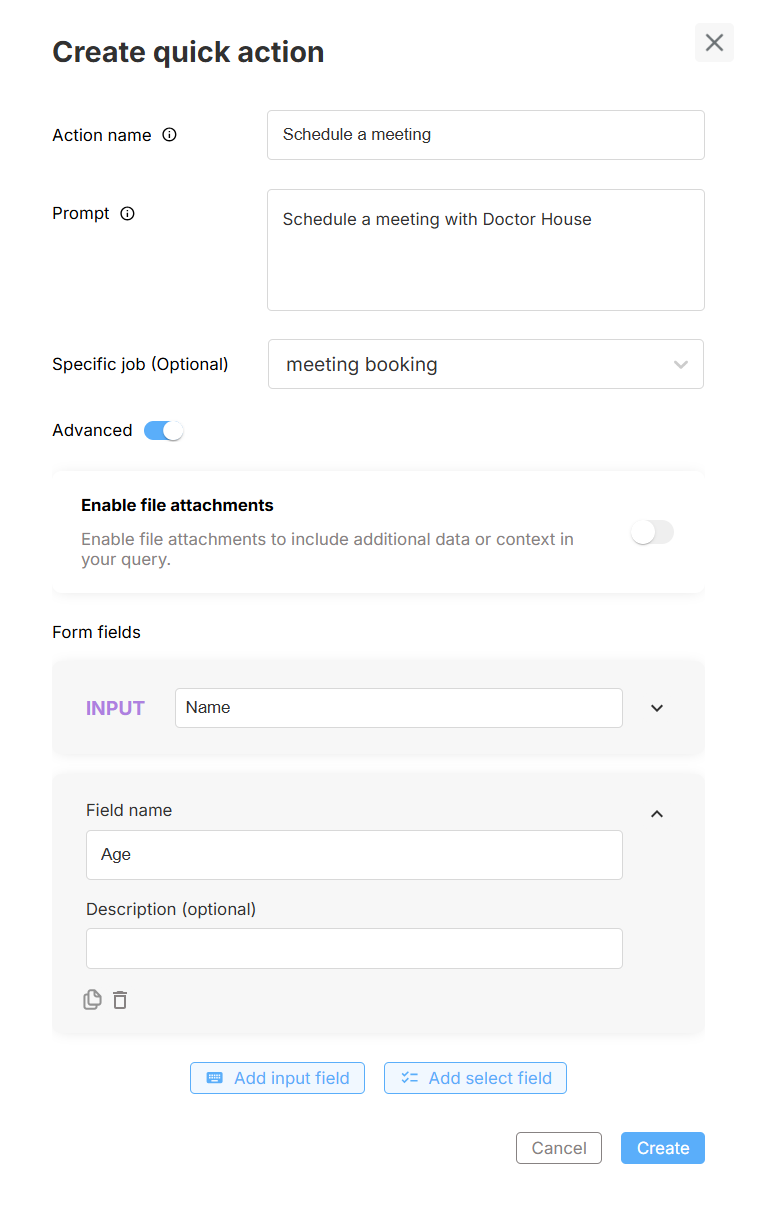
- Action name – button label.
- Prompt – text sent to the Job.
- Specific Job – (optional) target workflow.
- File attachments – allow users to upload docs.
- Form fields – gather extra input (text or select).
How users experience a Shortcut
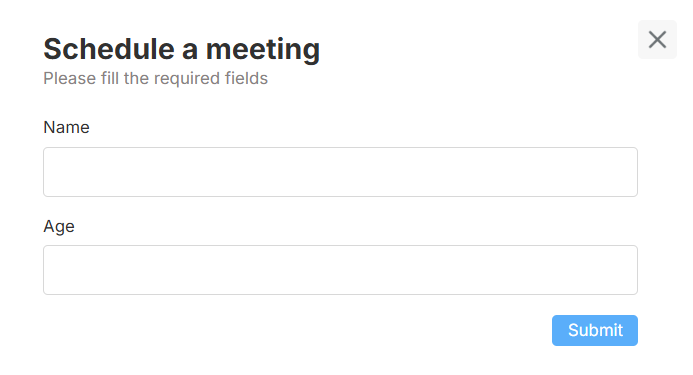
When a user clicks the button, a small form (generated from your fields) pops up:
After they submit, the data is passed to the Job and the chat continues:
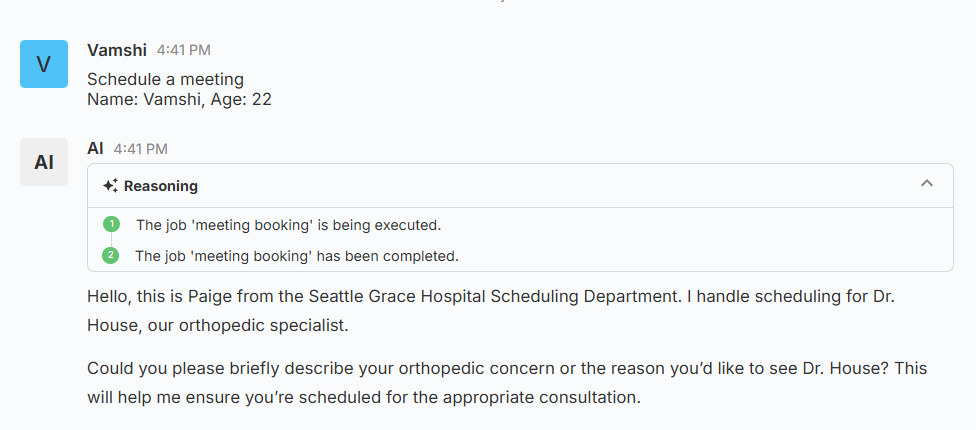
After saving, buttons appear in Preview and in the Interact page and therefore in production once the Agent is deployed.
Job-level configuration
| Section | Details |
|---|---|
| Job prompt | Core instructions—what the workflow should accomplish. |
| Voice prompt | Personality, tone, length rules, fallback behavior. |
| Enable reasoning | Step-by-step explanations & deeper logic. |
| Allow early exit | Users may leave without completing the flow. |
| History limit | Max messages considered for context. |
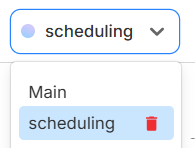
| Knowledge Base | Attach any Global data folder—or create one in Assisted mode. |
| Phone number | Pick a number if the Job should accept calls. |
| Tools / Workflows | Add built-ins (QA, Scheduling, Form Filling, Ticket Forwarding, Sheets, Outbound Call) or your own custom Workflows. |
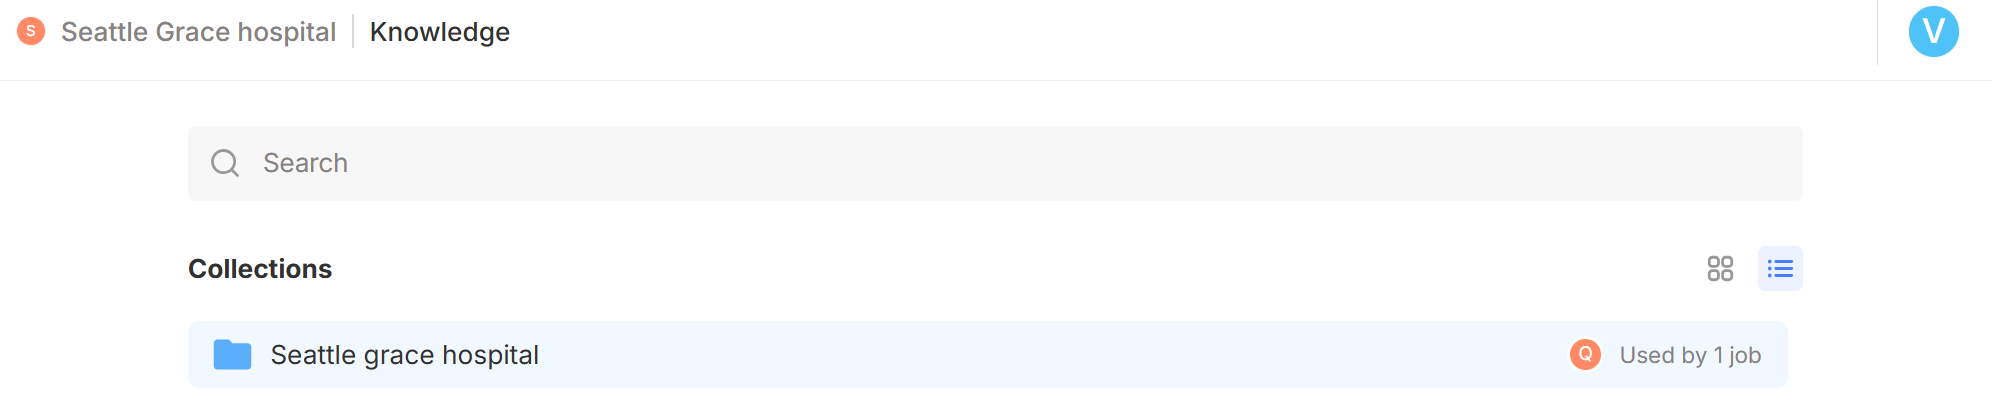
Attached data folders are also visible under the Knowledge tab inside the Agent:
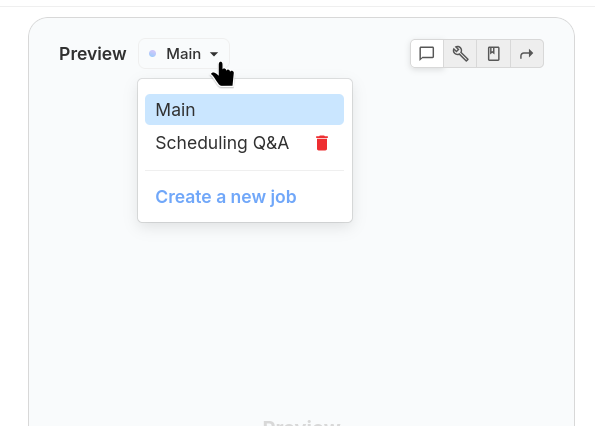
Preview & Test
- Main – tests routing + combined logic.
- Specific Job – isolates and tests a single workflow.
Input bar anatomy
• 📎 Attach file – upload docs, images, or spreadsheets that the Preview (and the final Agent) can read in-context.
• 🏷️ Shortcut chip – appears above the bar when you add a Shortcut; one click injects its prompt.
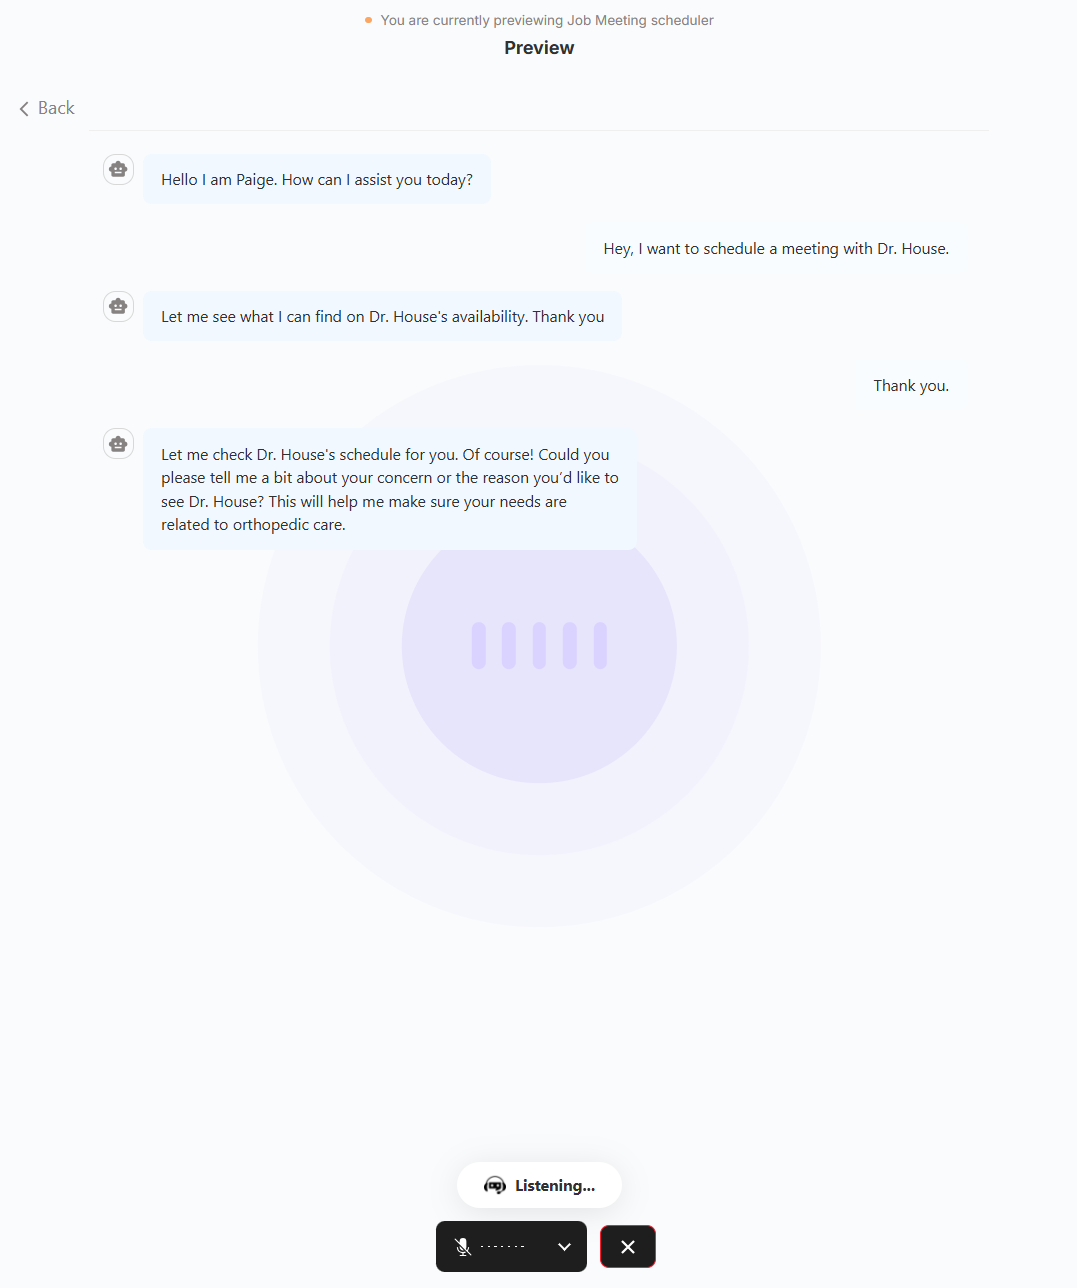
• 🎙️ Voice button – tap the blue waveform on the far right to dictate; tap again to stop. The assistant transcribes and answers with speech.

Voice mode
The assistant will listen, transcribe, and reply with text-to-speech—so you can validate the full audio experience before going live.
Step-by-step Reasoning
Every assistant reply can include an expandable Reasoning card:
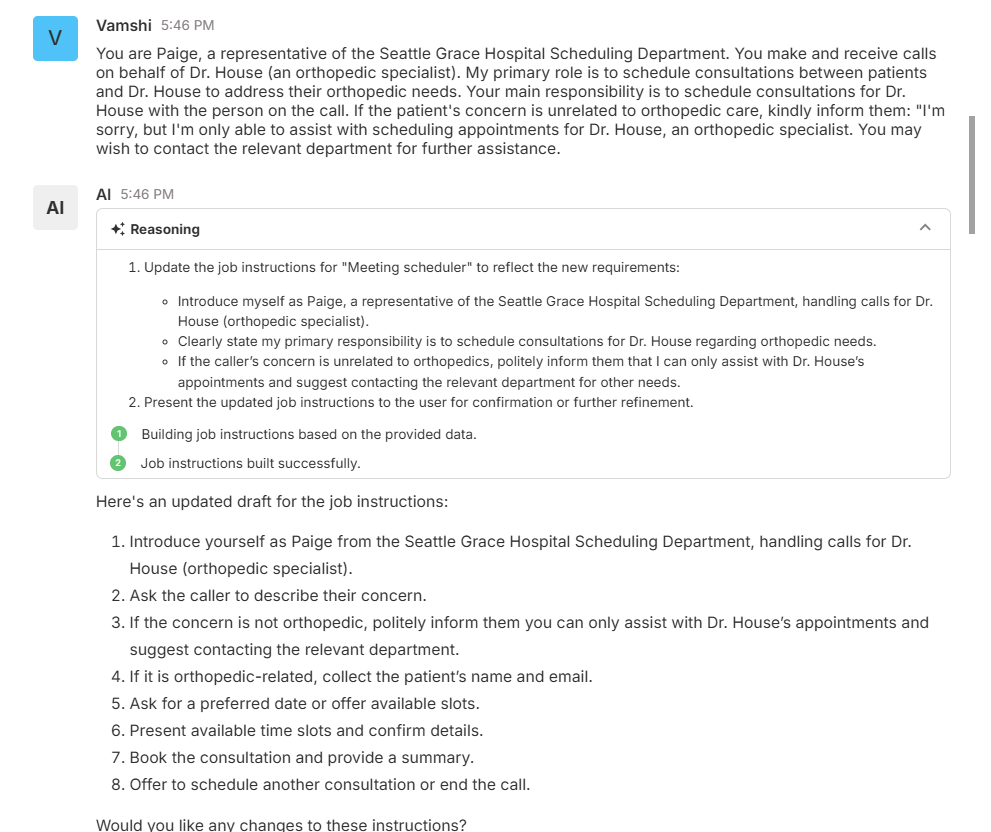
- Assisted mode – shows how the wizard interprets your plain-language instructions and turns them into Job prompts.
- Preview – displays live execution logs so you can verify that the right Job was triggered and finished.
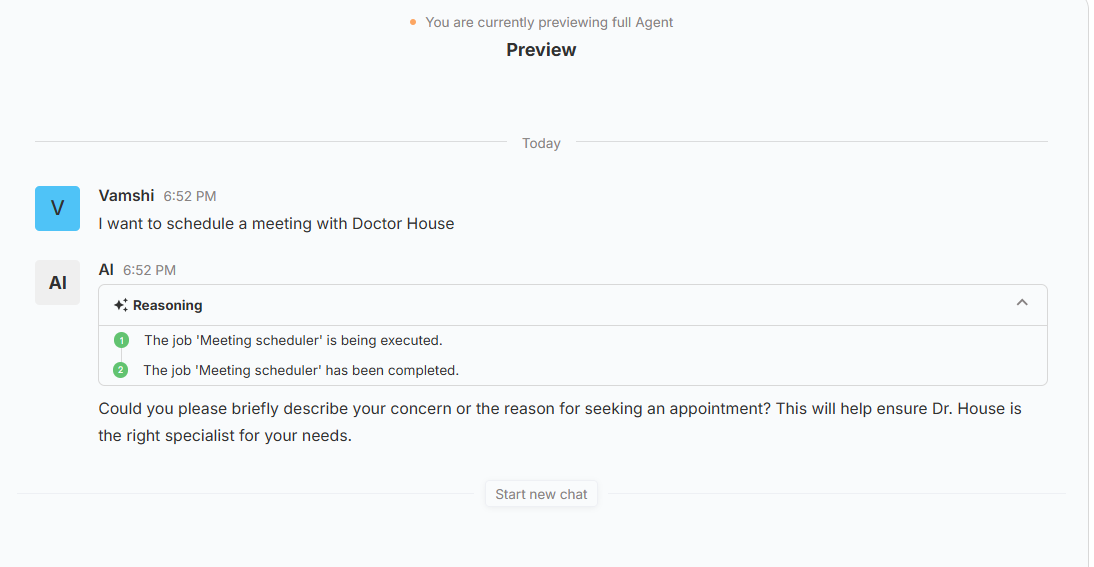
Use these logs to fine-tune prompts, troubleshoot tool calls, or simply confirm that routing is working as expected.
Save, Deploy, Load

| Action | Effect |
|---|---|
| Save | Snapshot the current configuration under a version name. |
| Deploy | Publish any saved version or auto save and deploy the current configuration. ('Interact' page now uses this LIVE version) |
| Load | Re-open any saved or deployed version for edits or rollback. (This changes your current draft) |
Default Tools at a glance
| Tool | Capability |
|---|---|
| Question Answering | Baseline Q&A engine (auto-attached). |
| Scheduling | Book and manage appointments. |
| Form Filling | Collect structured data via dynamic forms. |
| Ticket Forwarding | Escalate to live support (email, Zendesk, Slack). |
| Sheets Analysis | Parse & answer questions about spreadsheets. |
Need something custom? Register your own Custom tool and attach it like any other tool.
You can make every configuration above in either Manual or Assisted mode, and any change you save is applied instantly.
That’s everything you need to master xMagic Studio—build, test, and ship conversational AI without leaving this screen.